

Creating a cardboard house is a fantastic way to unleash your creativity and have some hands-on fun. Whether you’re doing it as a school project, a weekend activity with your family, or just because you love crafting, this guide will walk you through the process step by step. At Mr Shifter East Anglia Ltd, we believe that projects like these not only spark creativity but also provide a great learning experience. So, grab your materials, and let’s get started on building your very own cardboard house!
Discover How to Make a Cardboard House
Gathering Your Materials
Before diving into the project, it’s important to gather all the materials you’ll need. Cardboard boxes are the main component, but you’ll also need a ruler, pencil, utility knife, strong glue, and some paint or markers for decoration. Ensure your work surface is clean and spacious. If you’re lacking cardboard, local stores often have spare boxes they’re willing to give away. Having everything on hand before you begin ensures a smoother crafting experience.
Choosing the Right Cardboard
The choice of cardboard is crucial to the success of your project. Opt for sturdy, corrugated cardboard, as it will hold up better than thinner varieties. Inspect the cardboard for any damage, such as tears or water stains, as these could weaken your house. If you have different types of cardboard, use the sturdiest pieces for the main structure and the lighter ones for details. This choice will make your house more durable and visually appealing.
Planning Your Design
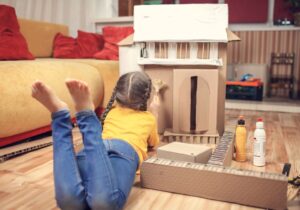
Before cutting anything, it’s wise to sketch out a design for your house. Consider where the walls, roof, windows, and doors will go. A simple pencil sketch on the cardboard can serve as a guide. This planning stage allows you to visualise the final product and make adjustments before any permanent changes are made. Don’t worry if your design isn’t perfect; it’s more about giving yourself a clear path to follow during construction.
Cutting Out the Pieces
With your design in place, you can start cutting out the different parts of your house. Use a utility knife for precise cuts, following the lines you’ve drawn. Always cut away from your body and be careful with the blade. If the cardboard is tough, make several light passes with the knife instead of forcing it. These careful cuts will help ensure that your house pieces fit together smoothly.
Assembling the Base
The base of your house is the foundation, so it needs to be sturdy. Lay out the pieces for the walls and use strong glue to attach them to each other. Hold the pieces together until the glue sets, and consider adding extra support inside the corners for added stability. This base will support the rest of your house, so take your time to ensure it’s well-constructed and stable.
Constructing the Walls
With the base in place, you can start constructing the walls. Glue the wall pieces to the base, making sure they are aligned properly. Hold them in place until the glue dries completely. Adding internal supports, such as additional cardboard strips, can help the walls stay upright. These strong walls will make your house sturdy and durable, capable of withstanding some rough play.
Making the Roof
The roof is an essential part of your cardboard house. Cut out two pieces of cardboard that will form the roof, slightly larger than the top of your walls. Attach them together at an angle to create a peaked roof, then glue this structure to the top of your walls. If needed, add supports inside to help the roof maintain its shape. A well-made roof completes the structure and adds character to your house.
Designing Windows and Doors
Windows and doors are what give your house personality. Cut out these features from the walls using your utility knife. You can leave them open or add extra details like shutters, curtains, or a small front porch. Experiment with different shapes and sizes for a unique look. These details make your cardboard house feel more like a real home, inviting and full of character.
Decorating the Exterior
Once the basic structure is complete, it’s time to decorate the exterior. Use paint, markers, or coloured paper to add details like bricks, siding, or even a garden. Think about how you want your house to look – do you want a rustic cottage or a modern townhouse? The decoration is where you can really let your creativity shine, transforming a simple cardboard structure into a work of art.
Creating the Interior
The interior of your cardboard house can be just as fun to design as the exterior. Paint the inside walls, create furniture from smaller pieces of cardboard, or add decorations like pictures and curtains. You can design different rooms such as a living room, bedroom, or kitchen. These interior details make your house feel lived in and provide a whole new level of creativity to explore.
Adding a Chimney
A chimney adds a charming touch to your cardboard house. To make one, cut a small rectangle of cardboard and fold it into a square tube. Glue it to the roof of your house, either on the side or in the centre. You can even add a small puff of cotton wool to simulate smoke coming out. This simple addition can make your house look more homely and complete.
Designing a Garden
Why not expand your project by creating a garden around your house? Use additional pieces of cardboard to make trees, shrubs, or a fence. You can even add a small pathway leading to the front door. Adding a garden can make your house feel more inviting and gives you even more opportunities to be creative with your design.
Crafting Furniture
Furniture can make the inside of your cardboard house more realistic. Use smaller pieces of cardboard to create items like beds, tables, chairs, or even a bookshelf. You can add these pieces to the different rooms in your house. This attention to detail will make your cardboard house more interactive and enjoyable to play with.
Adding Personal Touches
Personal touches can make your cardboard house truly unique. Maybe you want to add a nameplate above the door, create a little garden, or add some tiny people to live inside. These small details can make your house feel more special and individual. There’s no right or wrong way to personalise your house, so feel free to get as creative as you like.
Creating Transparent Windows
For a realistic touch, you can create transparent windows. Use clear plastic from packaging or plastic wrap, and cut it to fit the window openings. Glue the plastic behind the window cutouts to give the appearance of glass. This simple addition can make your house look more polished and professional.

Making Curtains or Blinds
Curtains or blinds add a cosy touch to your windows. You can make these using small pieces of fabric, paper, or even tissue paper. Attach them to the top of your windows, allowing them to hang down naturally. You can tie the curtains back with a small piece of string or ribbon for an added decorative touch.
Designing a Front Door Mat
A front door mat is a small but effective detail. Cut a small piece of cardboard or fabric and place it in front of your door. You can paint a welcome message or pattern on it to add some charm. This simple addition can make your cardboard house feel more welcoming and complete.
Making a Pathway
A pathway leading to your cardboard house adds a nice finishing touch. Use small pieces of cardboard, stones, or even coloured paper to create a path from the front door to the edge of your display area. This pathway can be straight or winding, depending on the look you want to achieve.
Building a Fence
A fence can add charm and character to your cardboard house. Cut thin strips of cardboard to create a picket fence, then glue them together and place them around your house or garden. You can paint the fence white or any colour you like. A fence adds a boundary to your house and enhances its overall appearance.
Adding a Mailbox
A mailbox is a fun detail to include. Cut a small piece of cardboard and fold it into a box shape. Attach it to a thin post and glue it near the front door of your house. You can paint it and even add a small flag or slot for letters. This tiny feature adds realism and charm to your cardboard house.
Creating a Doorbell
A doorbell is another small but fun addition. Use a small button or bead and attach it next to the front door. You can leave it plain or paint it to match the rest of your house. This simple detail adds a playful touch to your cardboard house and makes it feel more interactive.
Designing a Roof Garden
A roof garden is a unique feature that can make your cardboard house stand out. Use a flat piece of cardboard to create a base on top of the roof, then add small plants, flowers, or even a bench. You can make the plants out of paper, fabric, or small bits of cardboard. A roof garden adds greenery and makes your house look more eco-friendly.
Adding Lighting
Lighting can give your cardboard house a magical touch. Use small, battery-operated fairy lights and carefully thread them through the windows or around the roof. This will make your house look warm and inviting, especially in the evening. Lights can transform your cardboard house, adding warmth and charm.
Displaying Your Cardboard House
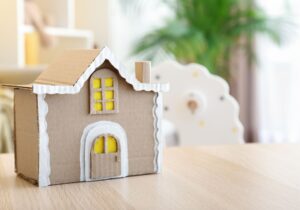
Once your cardboard house is complete, find the perfect spot to display it. Whether it’s on a shelf, table, or even as part of a larger play area, make sure it’s somewhere it can be appreciated. Take pride in your creation, and don’t hesitate to show it off to friends and family. Your hard work deserves to be admired.
Building a cardboard house is a delightful and rewarding experience. It allows you to combine creativity with practical skills, resulting in a project that you can be proud of. At Mr Shifter East Anglia Ltd, we encourage activities that inspire creativity and learning. We hope this guide has helped you on your journey to creating a beautiful cardboard house. Enjoy every moment of this fun project!